
“Good bread is the most fundamentally satisfying of all foods;
and good bread with fresh butter, the greatest of feasts.”
– James Beard
The oven was hot and the fire, steady. I propped open the cookstove door and tapped the top of the two bread loaves baking nicely away- the crusted top of the loaves were golden and boasting of readiness. Tapping the crust, I could hear the hollow sound of indication that the bread was finished. Sliding the bread out of the toasty oven and rolling it onto a wire cooling rack, the country kitchen immediately was filled with the sweet and wonderful smell of homemade bread. Leaving the bread to cool for a few minutes, I warmed up the tea pot and wiped off the counters.
“The smell of good bread baking, like the sound of lightly flowing water,
is indescribable in its evocation of innocence and delight…”
– The Art of Eating
Bread making was was not always this way for me. Blobs of failed dough and soggy insides were a common story in my last kitchen. At the beginning of our whole foods journey, I depended solely on our bread-making machine to make our bread. Then with a happy accident, one day, my husband tossed out the machinery that did all the work and I was suddenly faced with a desire – and need – to learn how to make our own homemade bread – everything from scratch.
At first, nothing worked.
It took practice; I had to work on learning how to make bread – sadly, I couldn’t even make cinnamon rolls at one point. I remember asking a friend to come over and help me make some cinnamon rolls as a thank you for our friends, who had helped us out, but each dish was a fail. Now, even my 10 year old can make delicious cinnamon buns!
Bread making has been a journey- yes, but it is one I LOVE! One of the best tasks I have as a homemaker is making bread from scratch. Kneading, mixing, measuring … seeing flour, yeast and salt turn into something wonderful, cozy, homemade and filling is just a little miracle of the day. Bread often is rejected in many people’s diet as they see it unhealthy, but if your bread is made with good flour, there is a nutritional value to your loaf. Certainly, ditch the white loaf of bread – it’s absolutely garbage.
“How can a nation be great if their bread tastes like kleenex?”
– Julia Childs
Some of my friends bake loads of bread and store them in the freezer for the upcoming weeks, but I prefer to make two loaves every other day. This means that we have fresh, delicious bread on hand and a bonus is the homey-smelling of fresh baked bread wafting through the kitchen.

I wish I could impart the love of breadmaking to others … it’s really not as challenging as you may think … everyone seems to make it a big deal because few people take the time to learn how to make bread anymore. However, breadmaking is not a tremendous task. It is a small labour of love and time, but that is about it.
One of my readers (Hello, Bobbie!) has asked for a detailed description in making bread. I am hoping this post can help you out if you are just starting on your breadmaking journey. We will keep it basic and simple. You can get into detailed bread making later (sprouted flour, how bread loves humidity, temperatures for crunchy crusts, sour dough, etc.), but for now, let’s just make a good, wholesome loaf of yummy, warm homemade bread.
Here are the ingredients you will need:
2 cups of warm water
4 teaspoons of yeast
6-7 cups of flour of your choice
a dash of salt
optional: honey or sugar as a sweetener (depending on your bread type)
That’s it! See? Simple. No eggs, no milk, nothing else. As you learn how to make this lovely simple loaf, you can experiment and add in some extras – like an egg, or herbs, cinnamon, fruit, etc. but for now, it’s a lovely easy dough to prepare.

First …measure out two cups of warm water.
It cannot be too hot, but it cannot be too cold. The correct temperature for the water is 105-110 F. Personally, I do not use a thermometer – I just make sure the water is quite warm.
Stir in 4 teaspoons of yeast. Let it sit for 10 minutes or so. This is called proofing your yeast. Let it sit until it becomes bubbly and looks ‘active.’


Now, while your yeast and water sit, measure out six cups of flour. You can use whatever flour you like – I use a mixture of spelt (freshly ground), whole wheat and perhaps a cup or two of just regular unbleached flour. I mix it up depending on my mood and what kind of bread I want to create. Other times, we are craving rye bread and I use rye flour (again, I can grind my own flour, which is a huge blessing). You certainly want a healthy bread, I’m sure, so make sure it is not all white flour (there are no nutrients, whatsoever, in white flour.)
**{If you have not done research on milling your own flour, you may want to read up on it.
There are incredible health benefits to milling your own flour.
Read more here, if you are interested in taking your bead making to another level.}**

Dump your flour into a big mixing bowl . You may use your mixer to make your dough or you can knead by hand. I knead by hand as I don’t like washing out the mixing bowl/attachments. 🙂 It’s just easier, I find, and also my mixer can only handle a small amount of dough. (And I don’t like machinery on my countertops.)
Now, add your yeast/water to your flour.
Start mixing with a big wooden spoon or spatula.

It will be messy and goopey but keep mixing. As you mix, add about 2 teaspoons of salt. [I do not measure my salt, so I am not the best on this judgement- I’m sorry!] If you want a sweeter bread, add a dollup of honey. Bread does not need sugar at all, but if you are wanting something sweet, now is the time to add the lovely sweetener of your choice.
Keep mixing…. until it looks like this:

It will now need some hand kneading.
Roll up your sleeves and get your hands ready for kneading. Flour your work surface and drop your dough onto the counter. (I use a big bowl and can knead the bread straight in the bowl – it is less mess to clean up.)
Stretch your dough, twist it, knead it. If you don’t know how to knead bread, here is a good video with basic instructions.
As you knead, your dough will start forming a ball. You want it to pull away from the sides of the bowl. Sometimes – mostly all the time! – I need to add a sprinkling of flour as I knead if it sticks too much to my hands.

Once your bread dough is kneaded and can form a nice somewhat smooth ball of dough, you are finished. Oil your bread bowl and place your dough back into the bowl. Swirl your dough ball around and have it covered with oil so it does not dry out. Place a tea towel on top and put your bowl in a warm location to rise. Let it rise until double in size. How long this will take will depend on how warm your kitchen is – I have a cozy spot above my warming drawer in my oven that I use.
Rather a piece of bread with a happy heart
than wealth with grief.
– Egyptian Proverb
Wash up your dishes while your dough rises, put on a kettle and have a pot of tea. Classical music playing in the background is always nice or perhaps put your feet up and read a chapter of your favorite book. For you busy moms, read a book to your children or finish your morning chore.

Once your dough has risen and doubled in size, it’s time for action. {Please note, bread dough made with whole wheat flour does not rise as fluffy as white bread dough. That is okay!}
Now at this point, you can make bread. Or you can punch it down and let it rise a second time. There is a lot of science behind this, but basically, if you have time, allow for the second rise. If you start your dough before breakfast, you will have plenty of time for a second rise.
{punched down}

Let it rise a second time until doubled in size.
After the second rise (risen again to twice the size) , drop your ball of dough out onto a floured surface and begin shaping your loaves. You may shape a free form loaf or a gently fold your loaf into a pan. Tuck the raw edges (the rough edges) underneath your dough to form a smoother loaf almost like you are tucking in a sheet at the edge of your bed. 🙂


For this bread making day, I decided to braid a loaf {which is always a lot of fun} and do a simple loaf in a bread pan (easiest for toast)…
To braid, just divide into three rolls and braid as you would for your hair. Pinch the top and braid. Tuck in the ends nicely.


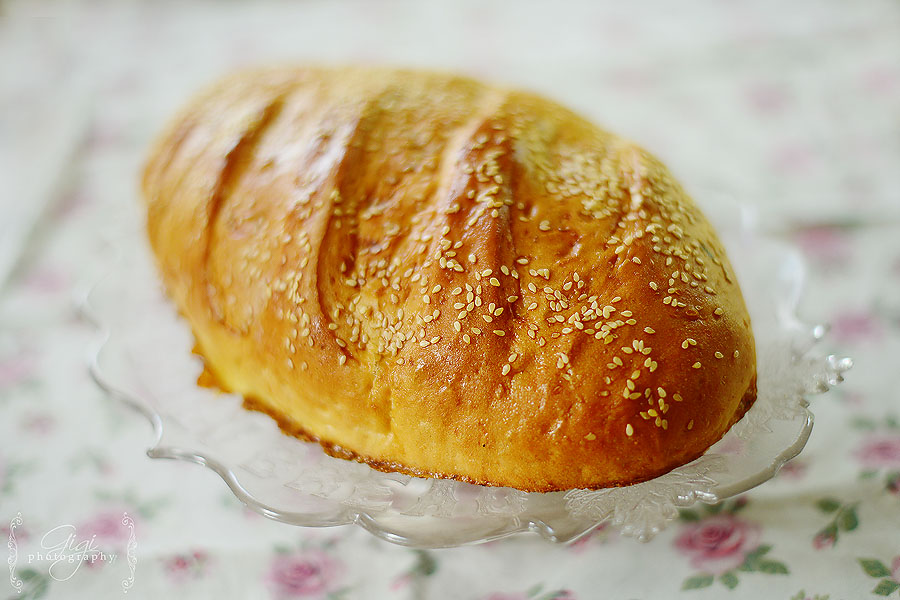
Sometimes, an egg wash on top makes for a lovely colouring, flavor and appeal. Mix an egg and a bit of water in a cup and brush gently over your loaf. As you bake your loaf, you should bring it out at the halfway point and do this again so the new expanded pieces of dough are also covered with egg wash. Sprinkle some seeds – sesame, chia, poppy – on top of your bread, if you wish.

Allow your shaped bread to rise and preheat our oven at this time to 350 degrees F. When your loaf is big enough (and not too big, as it will just collapse and fall!), pop it into the oven and wait for about 35-45 minutes. When the top is a nice golden brown and it sounds hollow when you tap on it, it should be done. Bigger loaves take a big longer. My braided loaves and circular loaves take longer to bake than a loaf in a bread pan, for example. The key is the hollow sound when you tap it.
When it is finished, place the bread on a cooling rack. This will ensure the bottom does not get soggy from the steam.


You may use this dough for cinnamon buns, raisin bread, apple bread or just a fancy dinner loaf.

Slashing the top of the loaf on angles changes the appearance, rolling it long for a French-style loaf and dusting it with flour is an option. And add sesame seeds, braid it, wash it with an egg wash, you can be creative … this is a basic bread recipe that will work wonders for most of your breads. You can even put it in a cast iron pot, slash the top, add seeds and cook in a hot oven and create a hearth-style-crusty-hearty bread. Roll it out, add brown sugar and melted butter and make delicious-amazing cinnamon buns.

Later, we can talk about sprouted flour, sour dough (a journey I am still on and have not perfected) and perhaps other types of bread dough.

I hope this post has helped someone in their bread making journey. If you have questions, please ask! If I have not clearly explained something, let me know and I will try to help out in the best way possible. I would love to hear from you. 🙂
by Gigi
21 comments